Purple Smokey Eye Makeup Tutorial Ft. 88 Matte Eyeshadow Palette Review
Hello Lovlies! Welcome back to Sense Of Beauty! Today's blogpost will be a makeup tutorial AND review! I spent AGES editing the pics to ensure they were understandable and easy to follow! I would like to say a HUGE THANK-YOU to my mum (photographer for this post) and sister Róisín (model for this post).
Let's begin with the makeup tutorial first!
M A K E U P:
Cien Moisturising Cream
Rimmel London Stay Matte Foundation in 100 Ivory
W7 Go Concealer in Fair
Natural Collection Pressed Powder in Neutral
Technic Pressed Bronzing Powder
Sleek Blush in Suede
Rimmel London Brow This Way Brow Gel in Medium
Essence I <3 Stage Eyeshadow Base
88 Matte Eyeshadow Palette
MAC Eyeshadow in Beauty Marked
NYC Liquid Eyeliner in Black
Derma Vio Mascara
KIKO Lipstick in 923
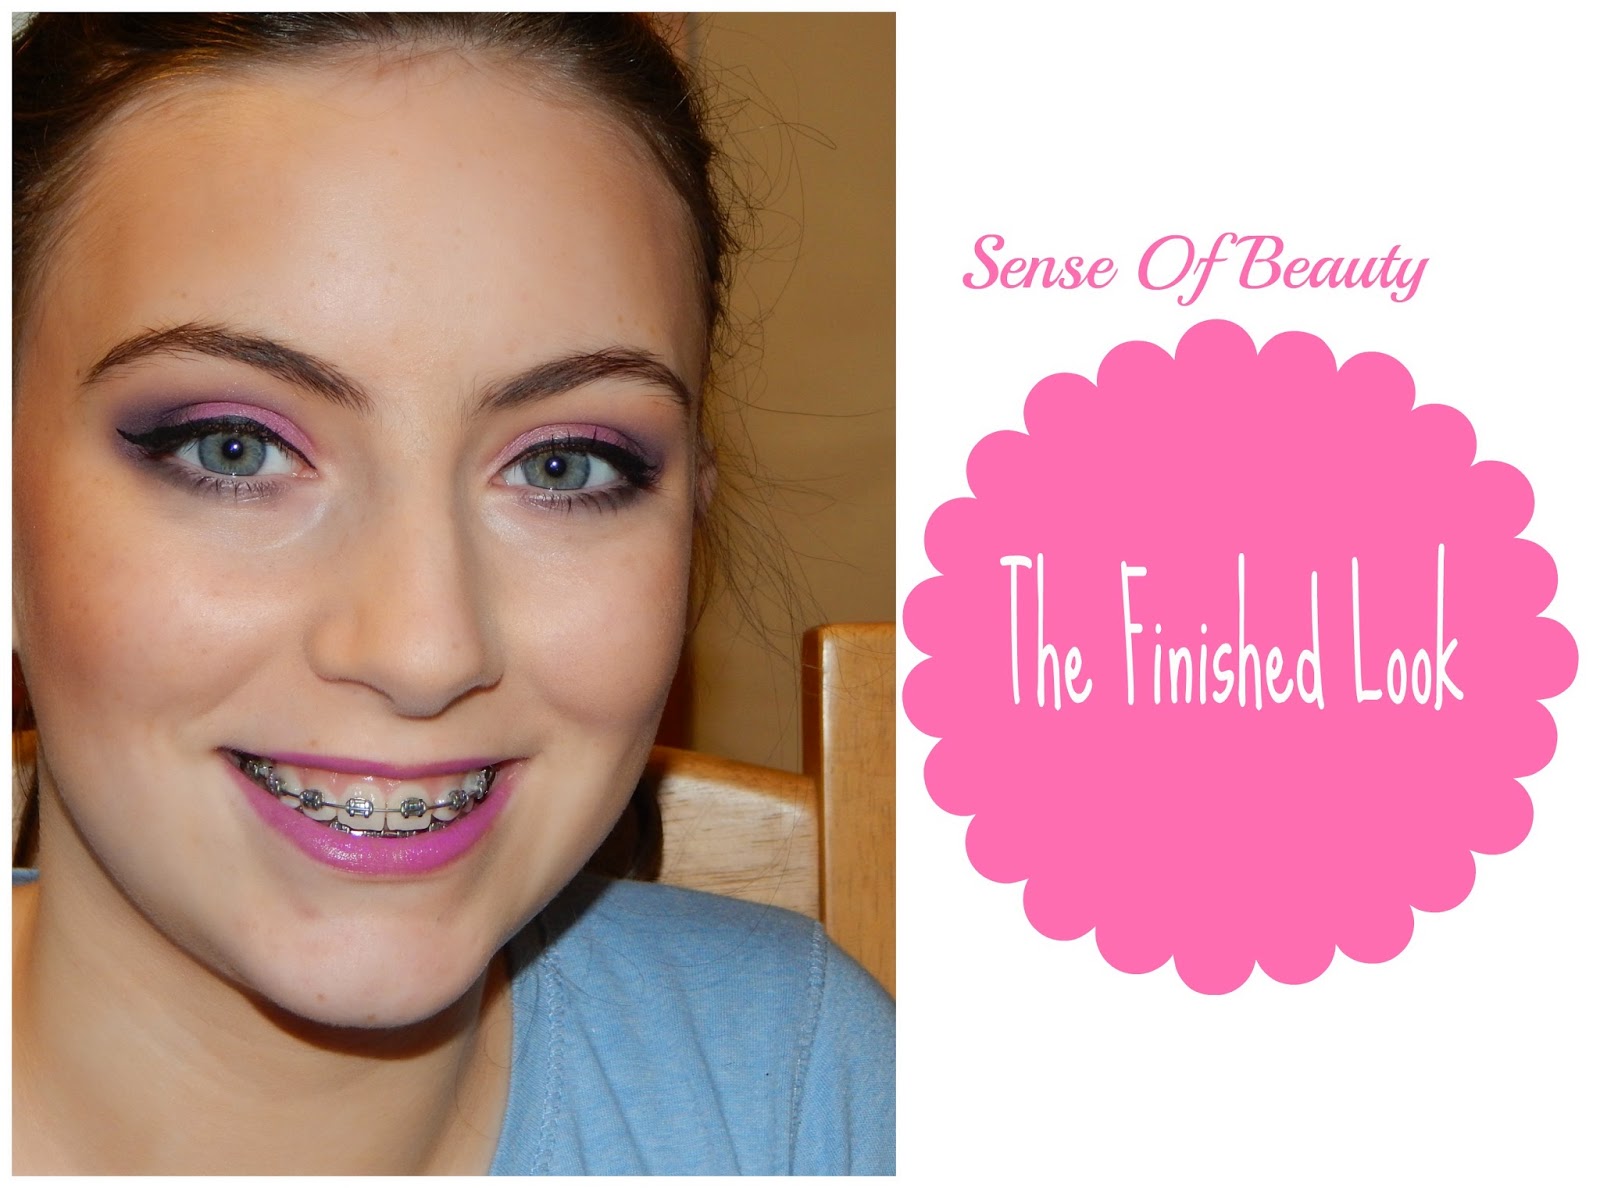
Check out the Before and After Pic:
Let's get started with the tutorial!
Step One:
Apply moisturiser to your face and neck. Especially in the Winter months, your skin can become very dry in areas. Applying moisturiser, adds moisture to your face, ensures your makeup will not look "cakey" and ensures your foundation does not cling to your dry patches.
I used the Cien Moisturising Cream on Róisín's face and neck. This moisturiser is one of my favourite moisturisers! It can be found in Lidl for no more than €3! For anyone with Sensitive skin, Cien also provides a Sensitive Skin version of this moisturiser.
Step Two:
Apply foundation once the moisturiser has been absorbed into your skin. If you don't allow the moisturiser to be absorbed, the foundation can be prone to sliding on your face and can appear streaky. I applied the foundation using a No. 7 Foundation Brush.
I used the Rimmel London Stay Matte Foundation in 100 Ivory. This foundation was slightly too dark for Róisín's skin tone, so I blended it down her neck also.
Step Three:
Apply concealer after your foundation. I apply concealer in a Triangle shape underneath Róisín's eyes, I find it highlights your face. I also apply the concealer on top of Róisín's eyelids. Applying your concealer to your lids can cover any discolouration and veins. It can also be used as an eyeshadow base to help the eyeshadows stick.
For concealer, I used the W7 Go Concealer in Fair. I used the No. 7 Foundation Brush to blend in the concealer. I ensured to gently blend the concealer in with the foundation brush as the under-eye area is very delicate.
Step Four:
For Róisín's eyebrows, I only used an eyebrow gel. Filling in your eyebrows is very important as your eyebrows frame your face.
I used the Rimmel London Brow This Way Eyebrow Gel in Medium Brown. Using a brow gel ensures your eyebrows are tame. Using a coloured eyebrow gel, darkens your brows.
Step Five:
Apply an eyeshadow base to your eyelid and lower lash line. Applying an eyeshadow base ensures your eyeshadows do not crease, increases their lasting power and improves the eyeshadow's pigmentation.
I used the Essence I <3 Stage Eyeshadow Base. I bought it for less than €3! I really enjoy using this eyeshadow base. It's definitely cheap and cheerful!
Step Six:
Apply a Transition Shade to your crease. Applying a transition shade will add immediate definition to your crease and will make future eyeshadows easier to blend.
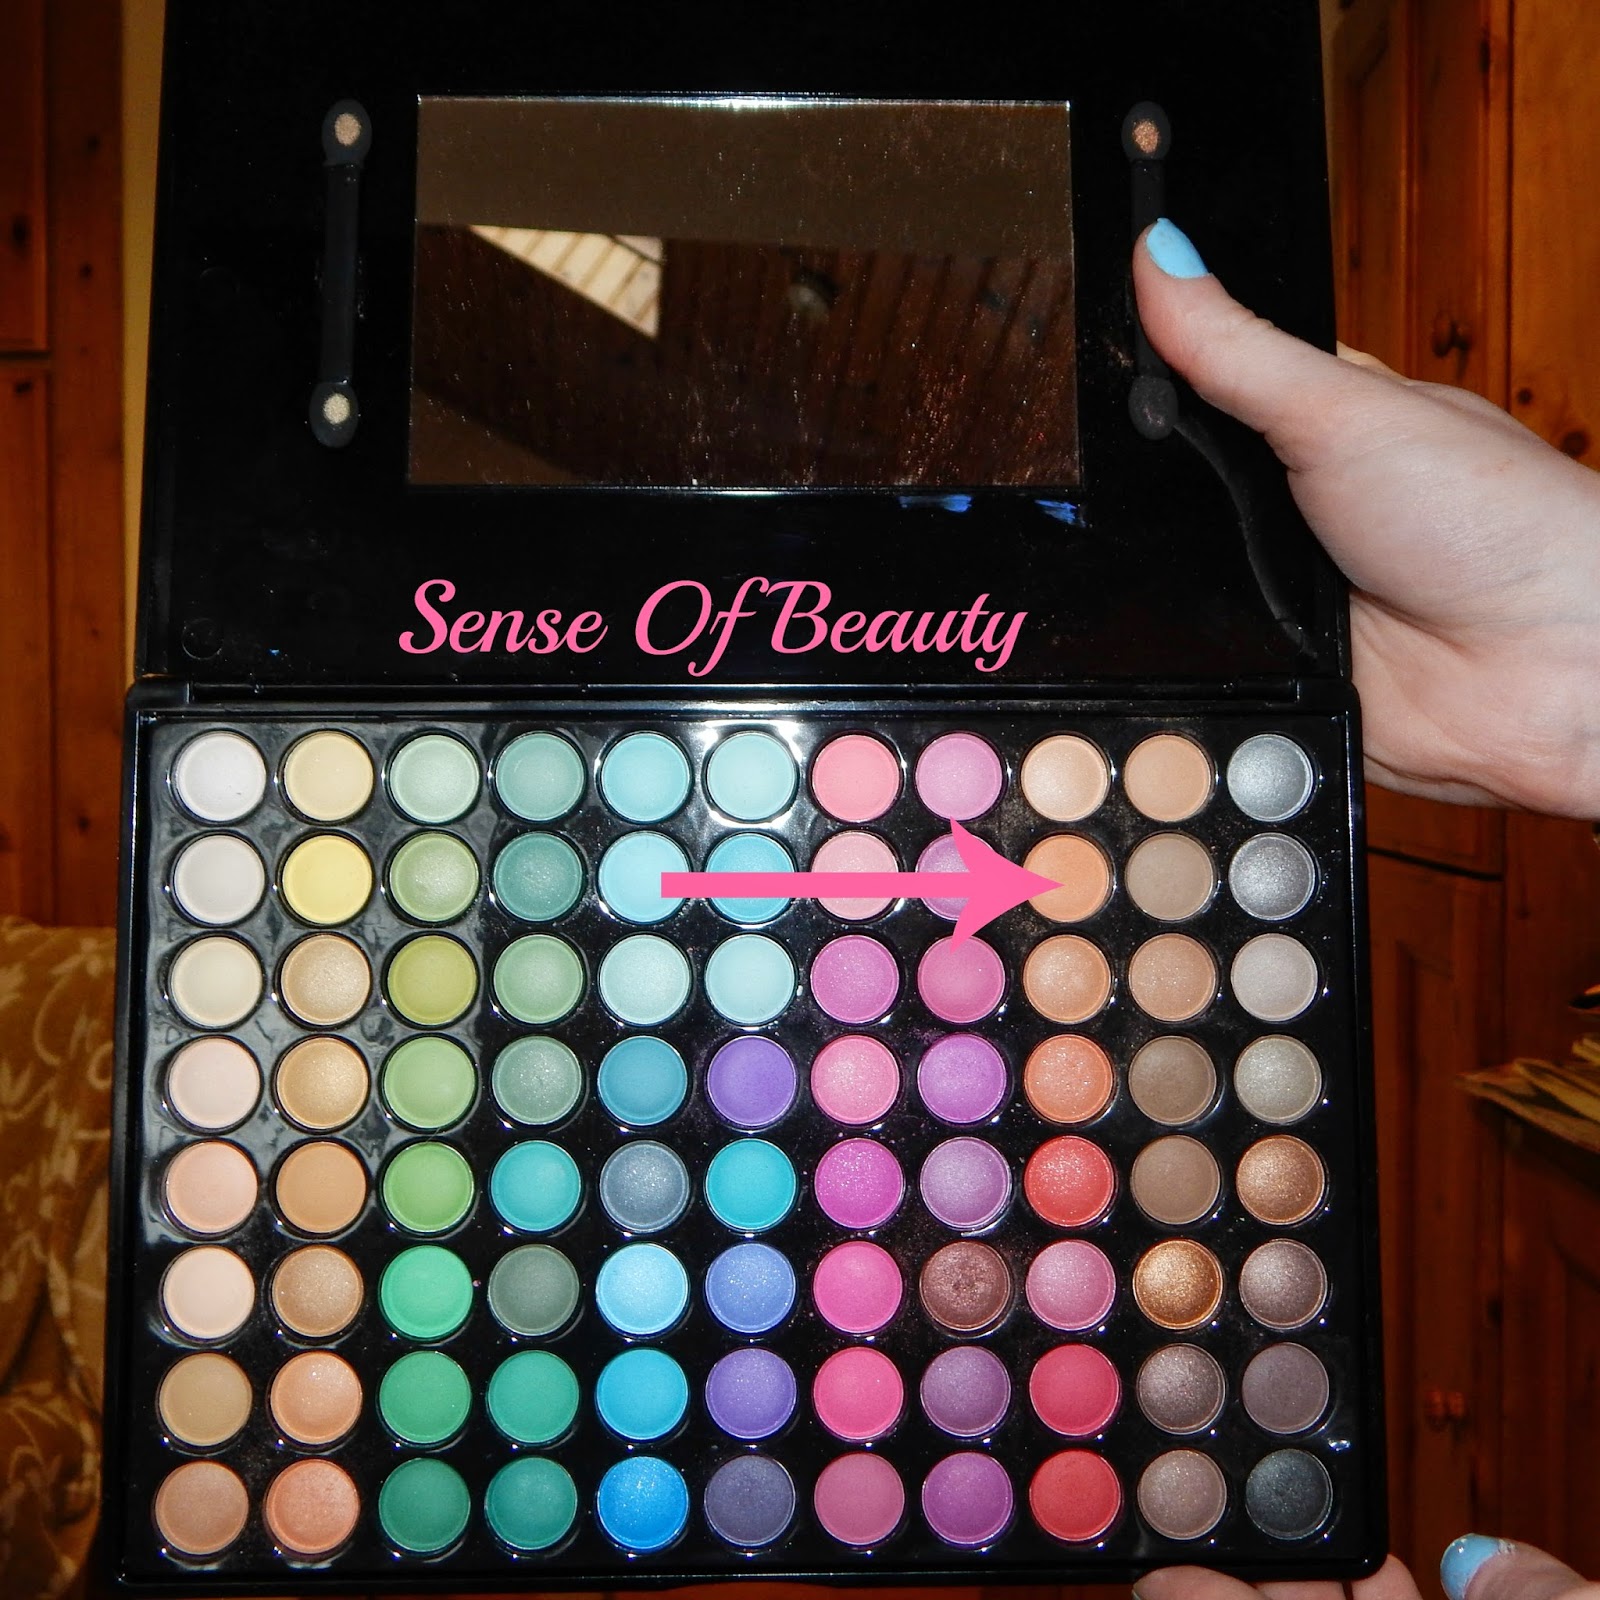
As a transition shade, I used a matte pale orange. I used the 88 matte eyeshadow palette.
Step Seven:
Using a Flat Eyeshadow Brush, apply your eyelid shade. When applying your lid shadow with a flat brush, ensure you pat the eyeshadow on instead of brushing it on. Patting the eyeshadow onto the lid will ensure less fall-out and will pack the intensity of the eyeshadow.
 For my eyelid shadow, I used a shimmery purple shadow from the 88 matte eyeshadow palette. I prefer to apply eyeshadows with shimmer on the eyelid and matte eyeshadows in the crease.
Step Eight:
Apply a darker matte eyeshadow to your outer corner and crease. I used a medium-sized fluffy brush. Applying this eyeshadow will blend the eyelid shadow and also deepen the colour of the crease.
I took a dark matte purple shadow from the 88 matte eyeshadow palette.
Step Nine:
Apply a darker shade to the outer corner and crease. To apply this darker shadow, I used a small blending brush from No. 7. I really like using this brush because the bristles are very soft.
I used a darker matte purple to further deepen the crease. I got this eyeshadow from the 88 matte eyeshadow palette.
Step Ten:
Apply a dark eyeshadow to the outer corner of your eye. To apply this, I used an Essence Pencil Brush. Using a dense pencil brush will allow you to pack the shadow onto your outer corner of your eye. Apply the dark eyeshadow with the pencil brush to your lower lash line too.
I used MAC's eyeshadow in Beauty Marked to deepen the crease. I love this eyeshadow!
Step Eleven:
Apply a matte white eyeshadow to your brow bone. I used a large fluffy brush by Calvin Klein to apply the brow bone shade. While applying the brow bone shade, ensure to blend the edges of the crease shadows.
I used a matte white shadow from the 88 matte eyeshadow palette. I prefer to apply matte highlight shade instead of shimmery. Shimmery highlight shades can look very messy and overwhelming with flash photography.
Step Twelve:
Line your upper lash line with black eyeliner. I lined the top lash line and created a slight cat eye.
I used an NYC Liquid Eyeliner in Black. I really enjoy using this eyeliner! The eyeliner is very opaque in colour. The eyeliner costs less than €2.
Step Thirteen:
Apply your favourite mascara. Ensure you apply mascara to your top and bottom lashes. Curl your eyelashes before applying your mascara.
I used the Derma Vio Mascara on Róisín's lashes. This mascara does a good job at separating your eyelashes. The consistency of the mascara is very watery. It can easily smudge on your undereye area.
Step Fourteen:
Apply a face powder to your face and neck. I pat the powder onto Róisín's face instead of blending it. Patting the powder onto your face will ensure your powder does not "cake" up under the small hairs on your face.
I used the Natural Collection Pressed Powder in Neutral. This powder is SUPER cheap and affordable! It's available in 3 shades; warm, cool and neutral.
Step Fifteen:
Contour your face using a small dense brush. I used a Sedona Lace Contour Brush. I applied the bronzer underneath Róisín's cheekbones and on her temples. Contouring your face adds warmth and dimension to your face.
I used a Technic Bronzer that I received for Christmas in a makeup set. The technic bronzer has great pigmentation and has some shimmer in it.
Step Sixteen:
Apply blush to your cheekbones. I like to apply blush by using the stipple method. The stipple method involves you patting the blush onto your face instead of brushing it on. I start from the hair line and work the blush forward toward the apple of the cheek.
I used Sleek's blush in Suede. I used this taupe shaded blush because I have purple on the eyelids. I used the Real Techniques Stipple Brush to apply the blush. It applies the blush so flawlessly!
Step Seventeen:
Apply lipstick. With the cold weather, your lips can become easily chapped. To prevent this from happening, apply a lipbalm to your lips when you apply your moisturiser at the beginning. Applying lipbalm will ensure the application of your lipstick is flawless.
I used a KIKO Lipstick in the shade 923. My sister Aisling bought this for me in Germany. I love the shade of the lipstick.
DONE!!
For my eyelid shadow, I used a shimmery purple shadow from the 88 matte eyeshadow palette. I prefer to apply eyeshadows with shimmer on the eyelid and matte eyeshadows in the crease.
Step Eight:
Apply a darker matte eyeshadow to your outer corner and crease. I used a medium-sized fluffy brush. Applying this eyeshadow will blend the eyelid shadow and also deepen the colour of the crease.
I took a dark matte purple shadow from the 88 matte eyeshadow palette.
Step Nine:
Apply a darker shade to the outer corner and crease. To apply this darker shadow, I used a small blending brush from No. 7. I really like using this brush because the bristles are very soft.
I used a darker matte purple to further deepen the crease. I got this eyeshadow from the 88 matte eyeshadow palette.
Step Ten:
Apply a dark eyeshadow to the outer corner of your eye. To apply this, I used an Essence Pencil Brush. Using a dense pencil brush will allow you to pack the shadow onto your outer corner of your eye. Apply the dark eyeshadow with the pencil brush to your lower lash line too.
I used MAC's eyeshadow in Beauty Marked to deepen the crease. I love this eyeshadow!
Step Eleven:
Apply a matte white eyeshadow to your brow bone. I used a large fluffy brush by Calvin Klein to apply the brow bone shade. While applying the brow bone shade, ensure to blend the edges of the crease shadows.
I used a matte white shadow from the 88 matte eyeshadow palette. I prefer to apply matte highlight shade instead of shimmery. Shimmery highlight shades can look very messy and overwhelming with flash photography.
Step Twelve:
Line your upper lash line with black eyeliner. I lined the top lash line and created a slight cat eye.
I used an NYC Liquid Eyeliner in Black. I really enjoy using this eyeliner! The eyeliner is very opaque in colour. The eyeliner costs less than €2.
Step Thirteen:
Apply your favourite mascara. Ensure you apply mascara to your top and bottom lashes. Curl your eyelashes before applying your mascara.
I used the Derma Vio Mascara on Róisín's lashes. This mascara does a good job at separating your eyelashes. The consistency of the mascara is very watery. It can easily smudge on your undereye area.
Step Fourteen:
Apply a face powder to your face and neck. I pat the powder onto Róisín's face instead of blending it. Patting the powder onto your face will ensure your powder does not "cake" up under the small hairs on your face.
I used the Natural Collection Pressed Powder in Neutral. This powder is SUPER cheap and affordable! It's available in 3 shades; warm, cool and neutral.
Step Fifteen:
Contour your face using a small dense brush. I used a Sedona Lace Contour Brush. I applied the bronzer underneath Róisín's cheekbones and on her temples. Contouring your face adds warmth and dimension to your face.
I used a Technic Bronzer that I received for Christmas in a makeup set. The technic bronzer has great pigmentation and has some shimmer in it.
Step Sixteen:
Apply blush to your cheekbones. I like to apply blush by using the stipple method. The stipple method involves you patting the blush onto your face instead of brushing it on. I start from the hair line and work the blush forward toward the apple of the cheek.
I used Sleek's blush in Suede. I used this taupe shaded blush because I have purple on the eyelids. I used the Real Techniques Stipple Brush to apply the blush. It applies the blush so flawlessly!
Step Seventeen:
Apply lipstick. With the cold weather, your lips can become easily chapped. To prevent this from happening, apply a lipbalm to your lips when you apply your moisturiser at the beginning. Applying lipbalm will ensure the application of your lipstick is flawless.
I used a KIKO Lipstick in the shade 923. My sister Aisling bought this for me in Germany. I love the shade of the lipstick.
DONE!!
Now onto the review!
I love this palette! The range of colours in this palette is incredible! The palette is very versatile and it can create simple and dramatic looks! For anyone wanting to grow their eyeshadow collection, I would definitely give this palette a shot!
The packaging is very professional and very high quality. The palette also includes a decent-sized mirror on the inside which can be very handy!
The pigmentation and quality of the eyeshadows are amazing! The only negative thing I have to say about this palette is that not all 88 eyeshadows are matte. Quite a few have shimmer in them.
Here's where the palette can be purchased:
http://www.wish.com/search/88mattepalette
I hope you enjoyed this blogpost!
Thank you SO much for stopping by!
Love,
Siobhán xo


No comments:
Post a Comment